Copyright © 2007 - 2025, Coachworks For contact data Click Here.
Copyright © 2007 - 2025
Copyright © 2007 - 2025,
Coachworks For contact data
Click Here.
![]()
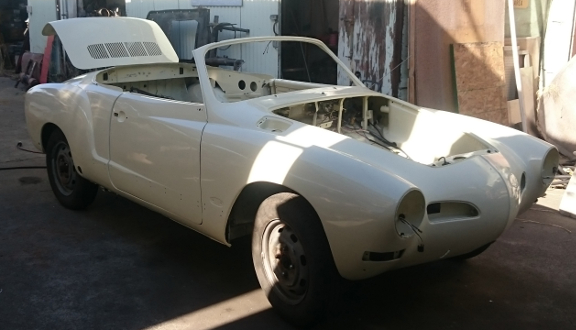
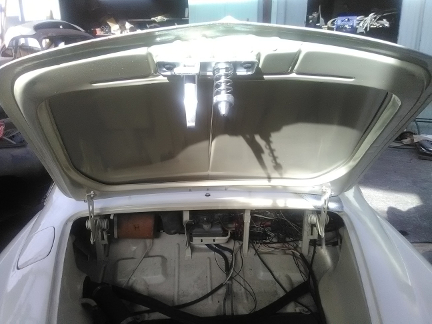
BELOW RIGHT: Here's the car during reassembly.
 Menu
of Information
Menu
of Information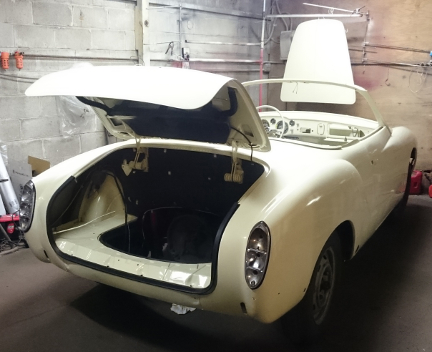 About
This Car
About
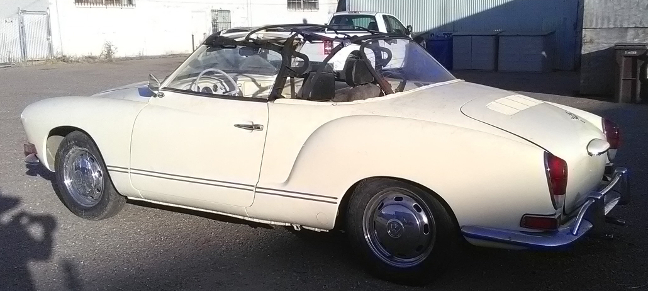
This CarThis car has never been in an accident that we can tell. Its nose is perfect.
AT RIGHT: Reassembly began several weeks after painting to ensure the paint had cured properly.
Karmann Ghias were dipped in primer, then painted on the outside, so, because primer isn't paint, they're prone to rusting inside the rocker arms; every Karmann Ghia ever made has rust inside the rockers and the only exceptions are those that have been gone through already and had paint applied while performing the work.
 This
Karmann Ghia has had both rocker structures completely deconstructed, new
metal welded in and along the way every surface inside the rockers was painted
so they're better than new!
This
Karmann Ghia has had both rocker structures completely deconstructed, new
metal welded in and along the way every surface inside the rockers was painted
so they're better than new!
The brake system has been gone through, it has a new steering coupler, steering wheel, the gauges are all freshly rebuilt by VDO and are correct for the 1962 dash that's been installed. It has a locking shifter and comes with a brand new top, complete with new header bows, and lots of internal parts of the top mechanism.
The car has a goodly handful of NOS parts, including a trunk linder, internal rear-view mirror base, mirror, and lense. It has a locking shifter for theft prevention.
The car has been in dry, indoor storage and not outside since 2007!
This car belonged to a customer of ours who didn't take our advice and simply sell it to buy a better car and instead hired us to restore it, but then, just after we'd stripped it down to a body shell, she got a new boyfriend who didn't support her vision of having this car restored and so she abandoned the car with us.
AT RIGHT: "Marriage" of the body and chassis! Note how nice the floors are, though this may not be the best shot to show it.
We eventually found someone who wanted to buy it but they wanted it as an electric car, not gasoline powered and wanted us to restore it. We agreed, but refused to "hack the car" for this purpose. The only non-stock alteration we approved of was switching the dash out to one from a 1962 Karmann Ghia so that it could accommodate a few more gauges he wanted to measure the battery pack. The contract we had with this guy forced us to go with his chosen electrical engineer who was to design the EV system, but that engineer took the money and never delivered several key components and the would-be customer broke the contract and backed out of the deal.
In addition to the dash change, this would-be buyer made some other choices, such as removal of the evaporative control system, though we saved the parts. His daughter liked a nearby Ghia's color and so we painted it to her taste, and he chose specific color combination for the top and headliner.
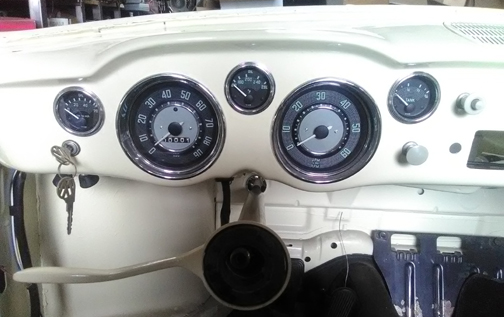
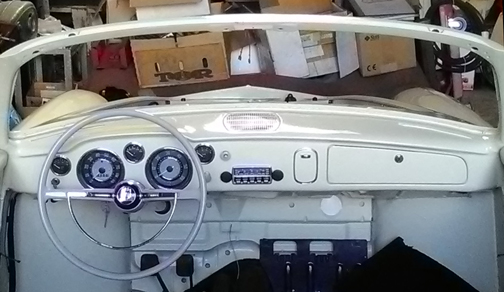
AT RIGHT: The dash, assembled. The dash is consistent with the 1962 sheet metal of the dash, not 1971. The glove box locks using the same key as the ignition. (The radio that's shown turned out to not work, so we've removed it from the car.)
So, back in our hands, we decided to put the original engine back in it, and complete the car the way we thought was better, such as filling the new gauge holes with new, style matching VDO oil temperature and pressure gauges, and we swapped the clock out for a tachometer.
This vehicle came to us needing "a tune-up." The owner had bought it and it had never run right for them. They found it difficult to start and keep running. It ran well on the highway but not around town. They needed someone competent and came to us.
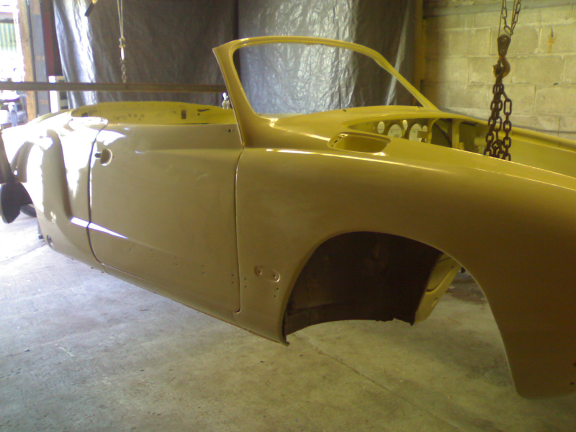
AT RIGHT: The body was painted while hanging, but with a different rear support. Here, the rear has been supported differently to permit it to be lowered onto the chassis.
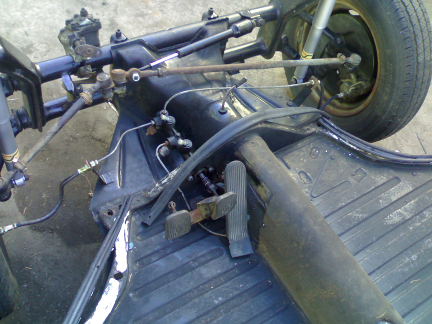
We found the problem in mere moments; the vehicle had been an autostickshift and it was incompletely converted for the standard transaxle. After removal of the autostickshift control mechanism, the pneumatic power take-off at the intake manifold had been left open to the atmosphere! Plugged, the engine ran great and the vehicle was on its way - it was a very inexpensive fix.
Delighted we didn't try and rip her off when others already had, she brought the car back, said she loved it and and asked for our opinion on what it might need as she was planning to keep the car long term. We knew it had rust issues because of the clear signs (see the "before" photos), so we informed her. She said that she had bought the car very inexpensively, and now knew why, but asked if there was something that could be done about the rust. We advised she either just enjoy it as is or find another one without rust issues and sell this one. She was insistent.
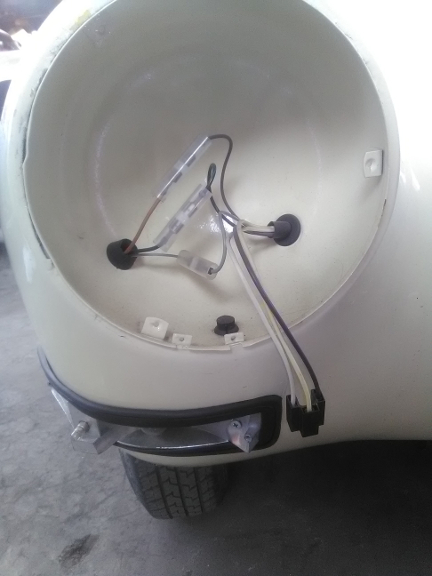
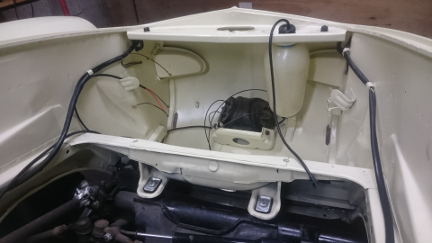
AT RIGHT: The wiring is nearly completely installed here - wiring is always first after painting!
Well, yes, something could be done, but we refused to provide a quote because we felt we'd spend maybe two days of work creating a good estimate and that we were pretty sure she'd say no becaues buying another car would possibly cost less. So, she agreed to pay for the estimate to be created. We worked up a quote doing a restoration she could afford; we were only going to focus on the corrosion and that's all. If she wanted the bumpers re-chromed, that could be done later, for example. She liked the quote and we agreed on a pay-as-you-go plan, and things started off smoothly - this was the late summer of 2007.
A few months in, at the worst possible time, she got a new boyfriend who did not like the car and she abandoned the job. We tried for over three years to get her back on-board but at some point she moved away and we never heard from her again. We ended up having to sell the car for unpaid storage fees and one of us bought it, then put it up for sale.
The car had all the rusty parts cut out of it and was dismantled into boxes. Nobody seemed interested in the car except to cut it apart for salvage until one day someone decided they'd love to buy the car IF it were restored and converted into an electric car! The idea was a contract purchase for the completed car, as opposed to them purchasing it and then having it restored. He had a electrical engineer who had previously done VW electric car conversions that he wanted us to work with, so we didn't have to know much about that.
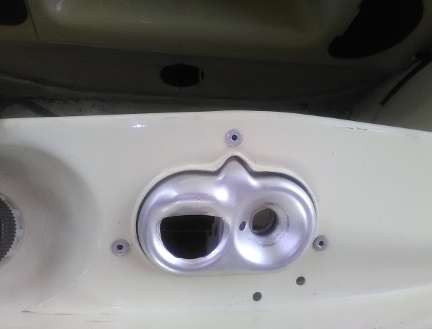
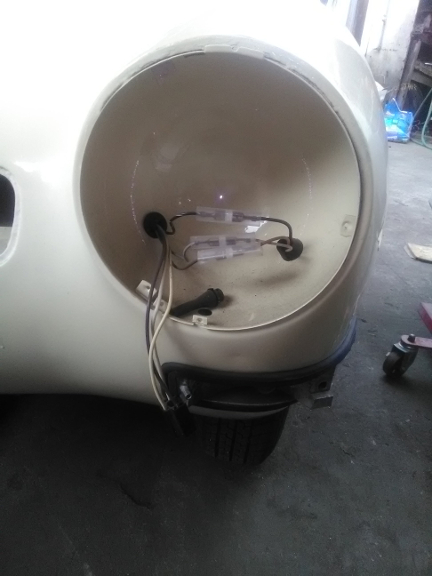
AT RIGHT: The gas tank has been powder-coated, and there's a new filler neck hose installed. Note the replated gas tank mounts and front hood lock receptical. It's about ready for the trunk liner! We have an NOS trunk liner that comes with this car!
Importantly, modification of the body in any way that would prevent it from "being returned to stock" fairly easily was refused. However, the buyer asked that the original stock dash - that was in pretty darned good condition, we think - be replaced with an early '60s dash. There was an engineering reason behind this; the guy doing the EV design wanted to put holes in the dash for more gauges and that wasn't going to work well with the original dash design. However, one of us owns an earlier Ghia that came from Karmann with two extra gauge holes in the dash, and so we could copy that using an earlier dash ... That was agreed to. And, so the dash was switched to one from 1962 and two additional holes were added in the stock locations Karmann had added additional gauges in, thus satisfying the EV system's requirements.
The contract had a few specifications to it. Firstly, it was based on the original estimate for the rust-repair and replacement of the top, so it was pretty minimal. We convinced him it should get a new wiring loom, all new rubber gaskets, but that's about it. We got a deposit to get started as "earnest money", the electrical engineer got paid and the money for the electric motor and batteries was paid for and we were to get a payment when done.
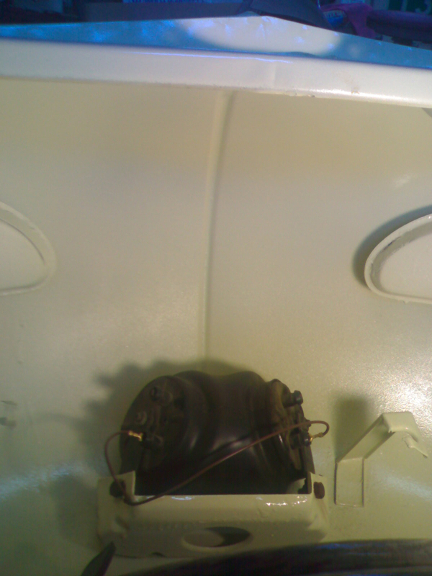
AT RIGHT: What we believe to be the original engine. We've driven the car with it! And, yes, we've replated the pulley and filler cap. You can just make out the pressure gauge sending unit to the left of the distributor.
We got the bodywork done to the guy's satisfaction, had it painted and was reassembling the car when the would-be buyer backed out. While the chosen electrical engineer delivered the electric motor, batteries, charger, and other components, vitally, he never delivered the EV control system. And the would-be buyer ended up abandoning the project. So now, we'd put in all this work but were paid nowhere near the value of the parts and effort we'd put into it and with no controller the project was stuck.
We couldn't justify spending the money out of pocket to complete an electric car only maybe few people would want, so we decided to just put the original engine in it and fill the dash holes with new VDO matching oil temperature and pressure gauges, and thrown in a matching tachometer while we were at it. We had a Porsche 912 engine on hand we briefly entertained selling with the car but someone bought the engine off of us. (...You can find a photo of that over here, and if you want such a thing in this car, we can certainly do that as one of us runs this Porsche business.
AT RIGHT: The keys to the car. The door locks take a different key than the ignition / glove-box, so those are the two VW logo'd keys. The other pair are for the Wolfsburg West reproduction of the original locking shifter - for theft protection.
We also realized that now we were free to do things our way, so we "upgraded" by powder-coating and re-plating a lot of the pieces, such as the hood lock parts, gas tank and so forth. But it's hard for us to justify putting yet more money into this project such as for a new carpet set that's needed. We've had the car now for 11 years! It's spent all of that time in indoor storge and the space is costing us big bucks! So, it's time for it to find a new home.
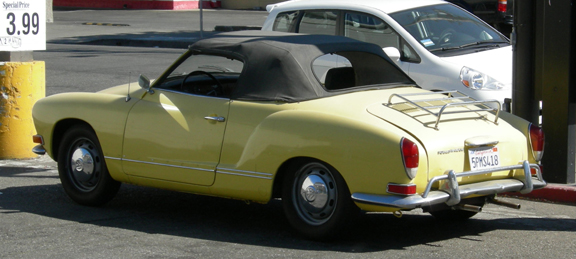
Here's one "before" image. (Note that the luggage rack has been removed but is available if you ask.)
Click here for more "before" photos.
Most of the metal work can be seen on this other page we created for that purpose - here are a few shots you'll find there.
BELOW: Here's the left rocker being reconstructed.
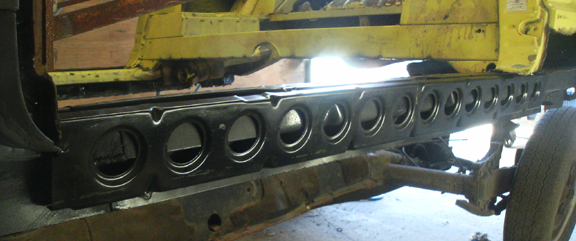
BELOW: Now note the same area with the stiffener welded in - and coated with POR-15 (the gloss gives it away) - and note that there's more metal below the stiffener. This piece had to be added in order to accommodate the outer skin properly. We show you why on our metal working page.

 The
Chassis
The
ChassisWe have a number of images of the chassis preparation, so we put them on their own page. That page is here.
 The
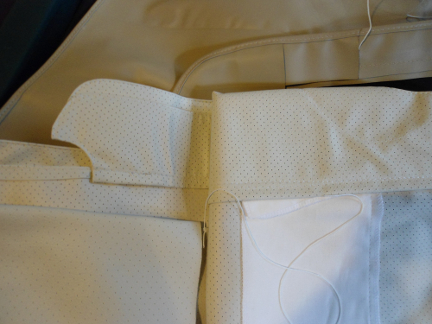
Cabriolet Top
The
Cabriolet TopWe have a page just for the cabriolet top mechanism and related parts. Find it here.
Here's an image from that page.
Obviously, we have already posted some images of reassembly above this point.
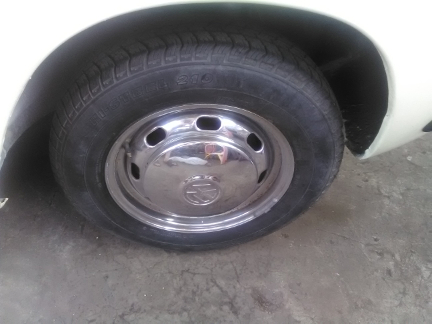
ABOVE RIGHT: The car came to us with typical satin-silver painted wheels. Since we had these original optional chrome wheels on hand, we fitted these with some good rubber. They're not perfect, but they're very nice original survivors the car could have been ordered with from new.
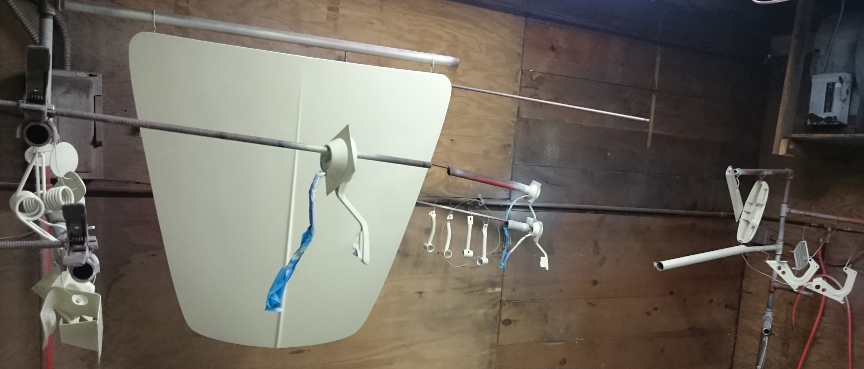
BELOW: Sharp-eyed viewers will note there are THREE turn signal switches being painted here, masked carefully to keep paint out of the electrical and mechanical functioning. That's just in case one of them doesn't work! And, yes, here we have the license light pod, all the various hinge parts, the various bumper arm covers, torson hole covers, glove box door, speaker grille, etc, etc, etc.
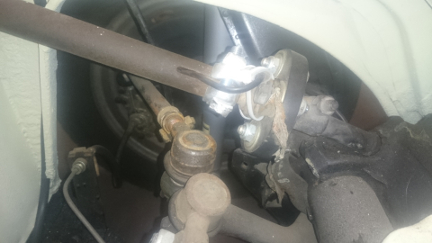
BELOW: On left, the steering-coupler ("rag joint") is new, of course, and we replated the mounting hardware. We replaced the horn grounding wire through the steering column shaft, but used the original horn grounding wire that jumps over the steering coupler. The '71 and '62 horn systems use "reverse logic" on the horn wiring, so we came up with our own solution, isolating the wire that runs through the column where on a '62 it would have been run directly to the grounding at the coupler. On the right you can see the body to chassis mounting hardware was also replated and the space is waiting for the gas tank to be installed.
The original bumpers were OK, but not great, and so we decided to replace some of the pieces and we've created a small web page for them.
If the agreement we agree to says the car will be a "driver," we intend to provide this car with these features:
OK, so one day the phone rang, it was a potential buyer, we came to agreement and this page documents what came next.
Want to see more of this vehicle?