Copyright © 2007 - 2025, Coachworks For contact data Click Here.
Copyright © 2007 - 2025
Copyright © 2007 - 2025,
Coachworks For contact data
Click Here.
![]()
 Okrasa
Engine for Sale:
Okrasa
Engine for Sale:
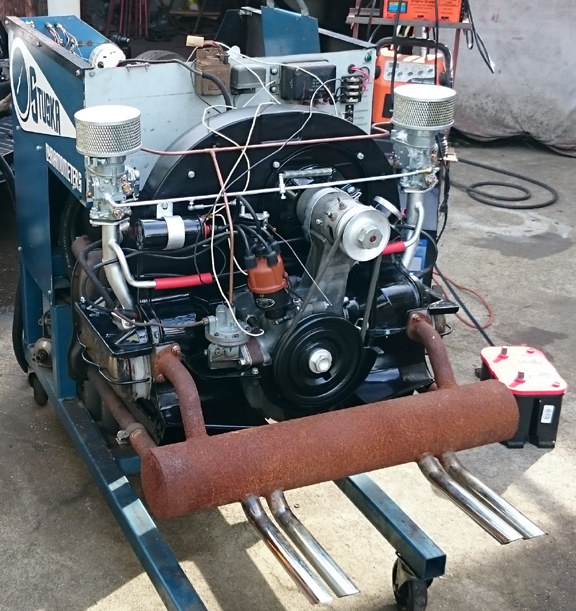
This engine is turn-key complete, run-in on our dynamometer, and ready for pickup or delivery now.
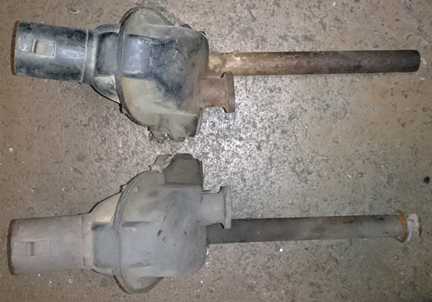
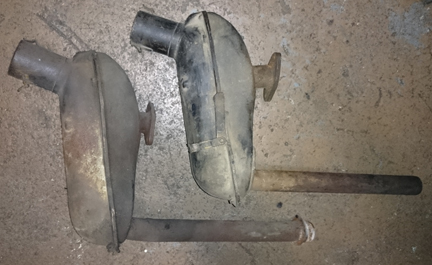
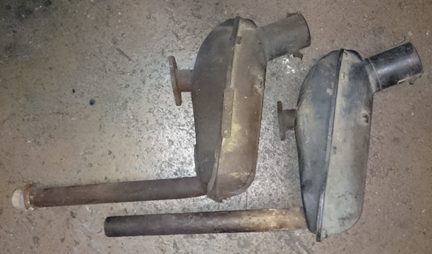
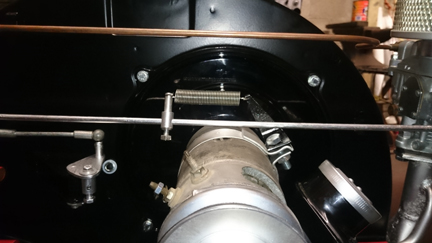
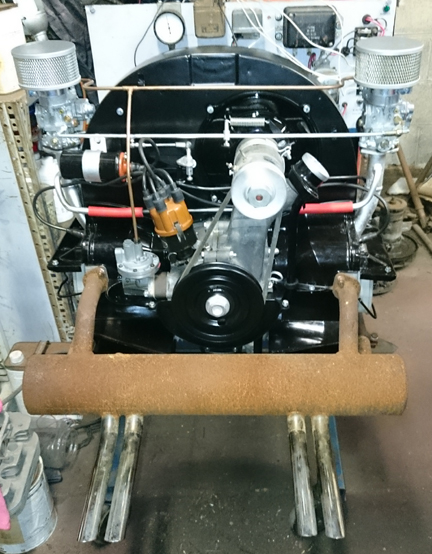
AT RIGHT: This Okrasa engine being run-in on our Stuska water brake engine dynamometer. The engine was notably set up with a 12v electrical system, but the generator proved faulty and it was switched to the standard 6v. The muffler is a vintage Autolux and has deep sound.
This "Hi-Rise" Okrasa engine is built into an un-numbered crankcase whose casting dates are from 1959. Similarly, lots of other details are from 1959 as well. It has new reproduction Solex carburetion and reproduction fuel line from pump to carbs, but is otherwise completely correct for its era, has a New Old Stock Iskendarian 2-J grind camshaft, New In Box OE pistons and cylinders from 30 years ago, and has just undergone a complete overhaul. Its internal components are fully balanced for smooth running, long life, and a few more HP. Though we don't usually test the output of fresh engines, we couldn't help ourselves and tested this one briefly right at the end of the run-in period and it got fully 50% more power than a stock engine.
This is NOT a Wolfsburg West Okrasa replica but the real thing.
Every detail about the engine has been attended to, as outlined below; nothing was overlooked. It has a great many new parts, had the valve guides and seats replaced to become unleaded fuel friendly, and runs very well.
 Background
on This Engine
Background
on This EngineThis engine was obtained to help an original Karmann Ghia owner with restoration of her car. Its prior history is unknown.
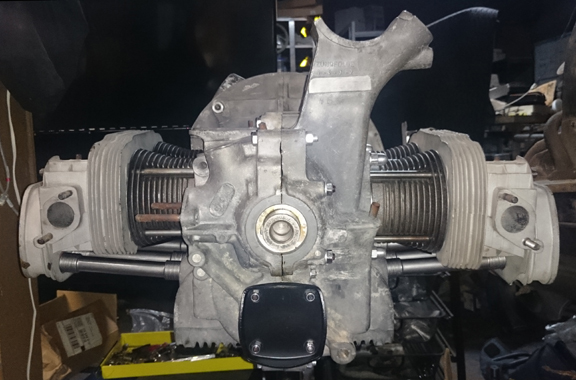
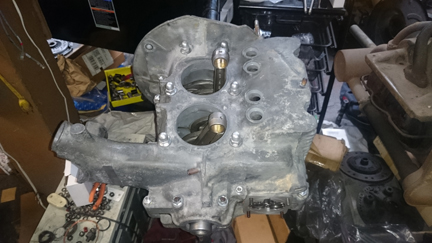
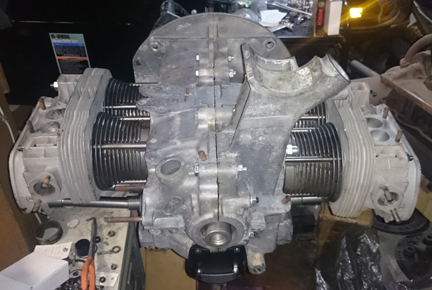
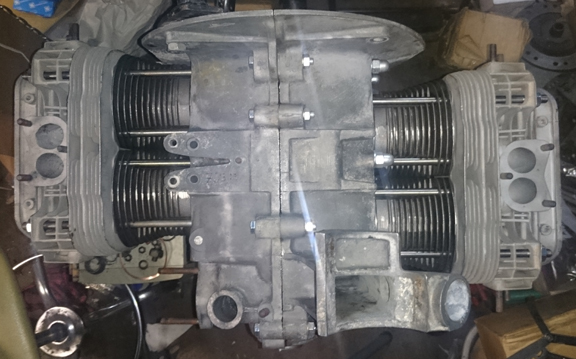
AT RIGHT: This engine as a completed long-block and not yet, of course, to turn-key status. Note the engine number stamping pad is blank. (See below for images of it being assembled.) The fill-in flash of the crappy cell-phone camera used to take some of the photos here makes the lower right case half look splotchy but other images here show that it's fine.
The engine came to us in pieces, no tear down was required, though we should have photographed the bits before cleaning and preparations for assembly.
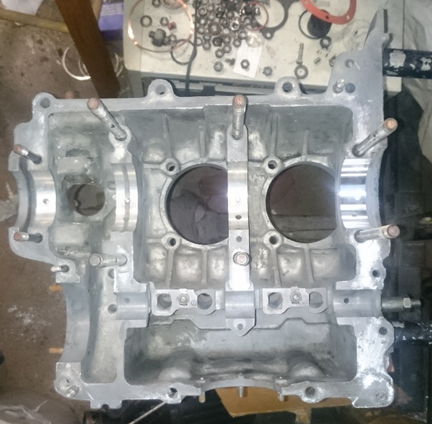
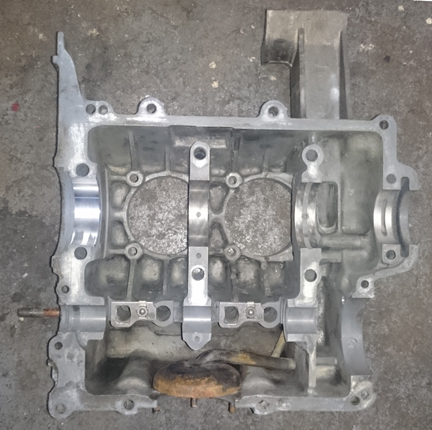
The crankcase was in pretty good condition. It just needed some cleaning, then a thorough inspection. It has been align-bored to 60.5mm, which is considered "first oversize."
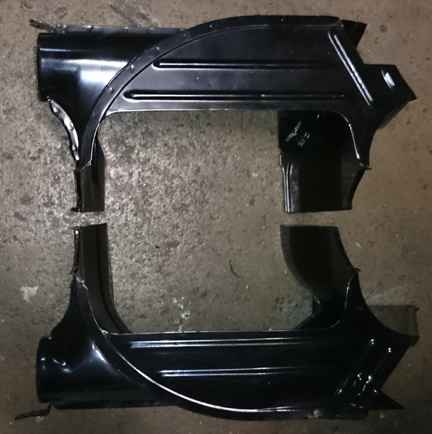
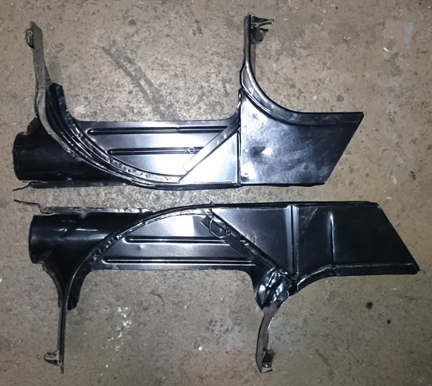
BELOW RIGHT & LEFT: The crankcase, clean, and inspected.
BELOW RIGHT & LEFT: The crankshaft before assembly (left) and after, ready to go (right). It's been magnafluxed (checked for cracks) and ground on both rod and main journals to 49.5mm (nominally), so it's at exactly mid-life.
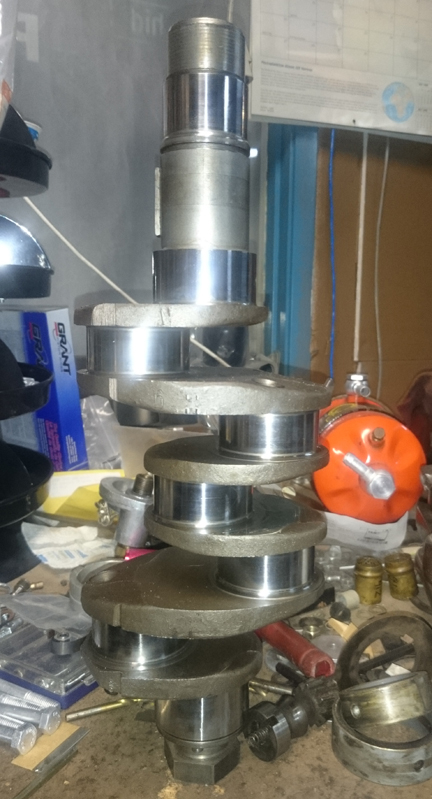

I usually build up crankshafts in my crankshaft stand, but it was busy with a Porsche crankshaft at the time...
For me, "rebuilding the rods" means to:
This is all standard work so there aren't any photos of them in-process.
AT RIGHT: The camshaft is a New Old Stock Iskendarian 2J grind which was widely considered the best camshaft specifically made for the Okrasa engine.
AT RIGHT: The iskendarian was threaded for inch-based bolts instead of metric ones like Porsche did. Note that it has a new gear mounted.
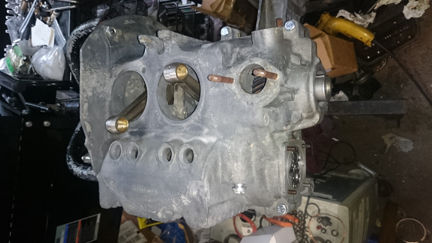
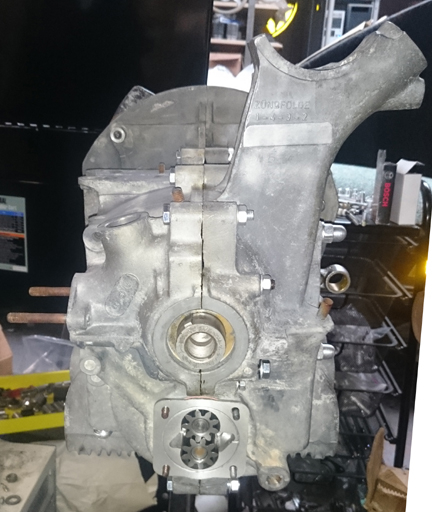
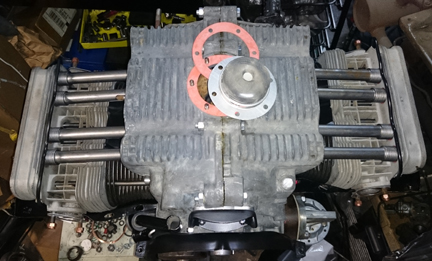
AT RIGHT: The left half is ready for the right half - except for the case sealant, of course!
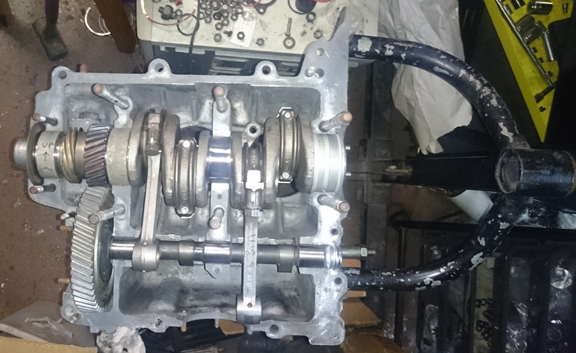
Almost immediately, we have a short-block. Then, the oil pump was added - it's a new "tall" one with gears that pump exactly double the original volume of oil for a given RPM (because they're exactly twice as tall).
The fill-in flash from the camera makes it look a little splochy. -shrug-
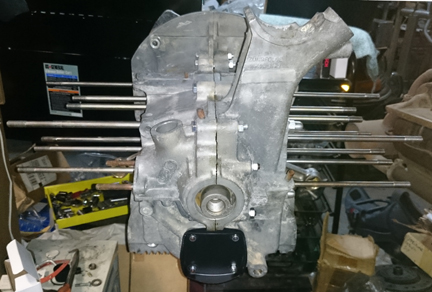
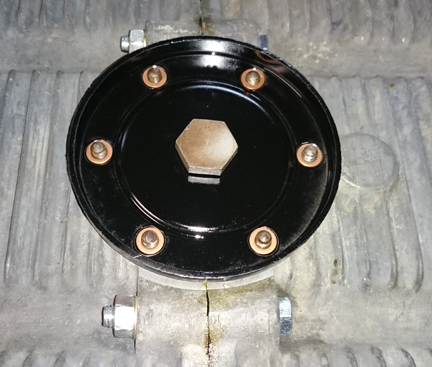
Not much progress in this next image - just the pump cover...
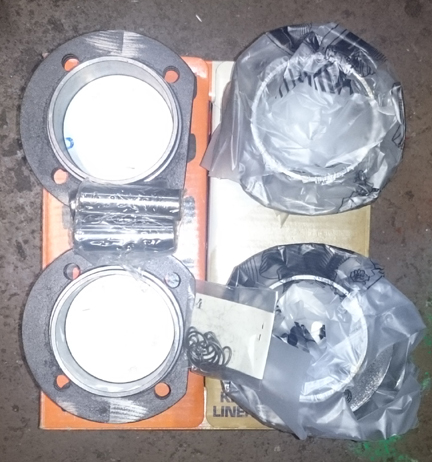
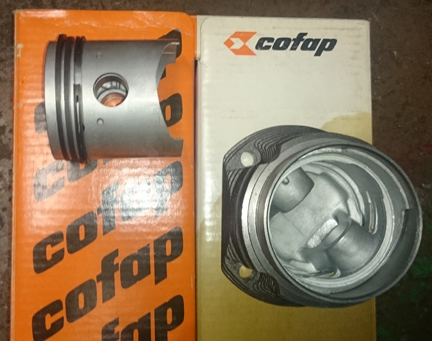
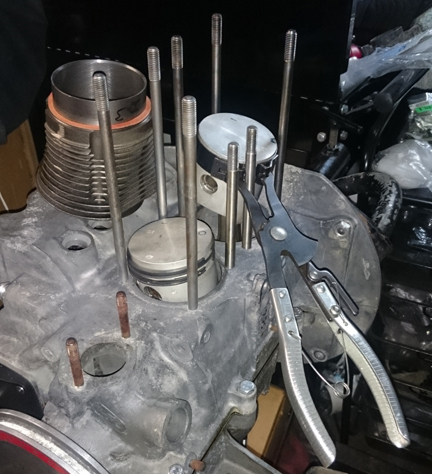
Time to install the Pistons and Cylinders. I've had these "new in the box" since the late 1980s in dry storage... I think I got them from Tony Moore in the first few months of operation of Wolfsburg West! Our understanding at the time was that these were made in Brazil from the original German tooling. I gave them a good inspection and found no flaws.
 It's
at this point that people usually rush ahead, but instead, we think this is
exactly the moment to slow things down and be deliberate! You have a lot of
choices when installing pistons and cylinders and a lot of checking to do.
It's
at this point that people usually rush ahead, but instead, we think this is
exactly the moment to slow things down and be deliberate! You have a lot of
choices when installing pistons and cylinders and a lot of checking to do.
When it comes to the cylinders, including fitting pistons to them, here's our process: Two of these steps require special tools most shops don't have.
I like to carefully measure everything and then mix-and-match the parts for superior fit. For example, the pistons are washed, and weighed bare, the pins weighed, and then pins and pistons are re-matched for a better balance. From there, the heaviest ones have material removed to match the lightest one with a target of 0.1g or less difference among the four within the set. This greatly aids in the smooth running of the engine.
In carefully matching up the parts, I have regularly found significant manufacturing errors with this process which would likely have gone unnoticed without these measures. It is remarkably easy, for example, to overlook the circumstance of the crankshaft bore not in the true center of the crankcase, angled on the horizontal left or right of center, or not on the same horizontal plane at all. Sometimes the pistons don't all have the same pin height (distance from pin center to crown). Examples of errors like these are not as uncommon as we would like. The key then is "did you even notice?!", and, if so, "what do you do about it?"
First, a height comparison check is done to ensure that there are no difference between the cylinder heights that the head itself "sees." The book value for tolerated error is 0.1mm (four thousandths of an inch), but in this case, there was no measurable difference between either pair, which is not unusual on 36hp engines.
Note that as a part of this work, one fits the cylinders to the right hand case half looking for interference with the cap nuts (or, on Porsche engines, the through bolt). Invariably on Porsche engines, no matter who made the cylinders (almost without exception), there's an interference somewhere, though it's unheard of on a 36hp engine. Generally, when there is an interference found, the cylinder is ground slightly to provide clearance, but some engine builders grind the cap nut or bolt head.
 We
mostly build Porsche engines, and on them, the next thing we do is something
nobody else does (that we know of) in the engine building process, and that
is to measure the height the piston crown comes above the plane of the top
of the cylinder. I call this the CAC, or "Crown Above Cylinder."
On Okrasa engines like this one, the piston doesn't come out of the cylinder,
but we still do the same basic measurement. The values thus obtained are important
because, firstly, they can reveal deeper problems, and because they helps us
get the compression ratio equal in all four cylinders.
We
mostly build Porsche engines, and on them, the next thing we do is something
nobody else does (that we know of) in the engine building process, and that
is to measure the height the piston crown comes above the plane of the top
of the cylinder. I call this the CAC, or "Crown Above Cylinder."
On Okrasa engines like this one, the piston doesn't come out of the cylinder,
but we still do the same basic measurement. The values thus obtained are important
because, firstly, they can reveal deeper problems, and because they helps us
get the compression ratio equal in all four cylinders.
Here are some of the deeper problems that can be discovered through a CAC check:
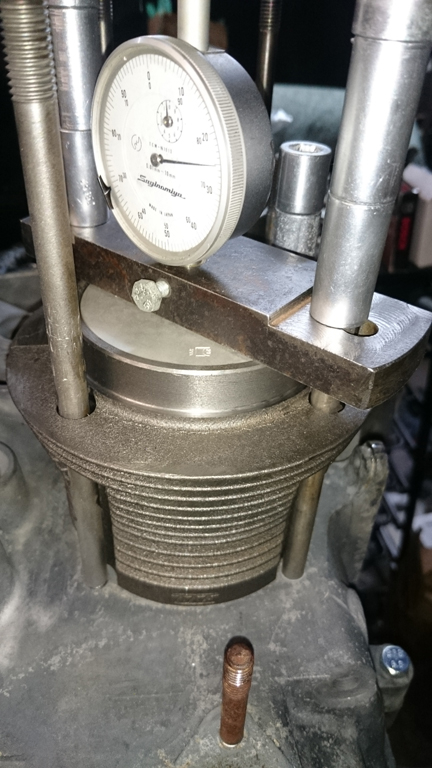
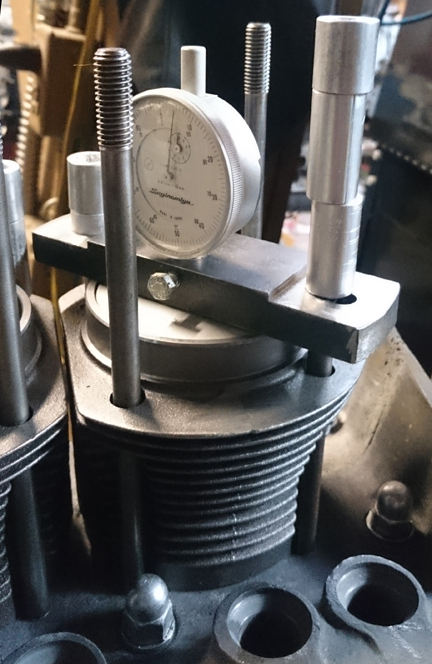
In order to do this for these engines, you have to have special tools. Here, you can see them in action at right.
If you can't read the dial face in the image at right, the distance between the smallest tick marks is one hundredth of a mm, or 0.0004", and you can discern to perhaps a tenth of that! So, this is a very accurate measure, performed while the cylinder is under torque, so any shims are squished flat, etc.
The accuracy is so good, that if you take the time to swap parts around, you can accurately determine discrepancies in the manufacture of the various parts! But, we ARE splitting hairs here! However, a benefit to both engine builder and customer is that the ability to move parts around for better fit means that perfection is more easily achieved, and the more equal the HP production of each cylinder, the smoother the engine will run, and the more HP the engine will produce overall.
Because this process includes the entire assembly, torqued as in service, and measures the height each piston protrudes out of its cylinder, all errors in connecting rod lengths, cylinder heights, crankcase spigots depths (cylinder bore deck), piston connecting pin heights, and shim thickness' are accounted for in the measurement results. There is no superior method.
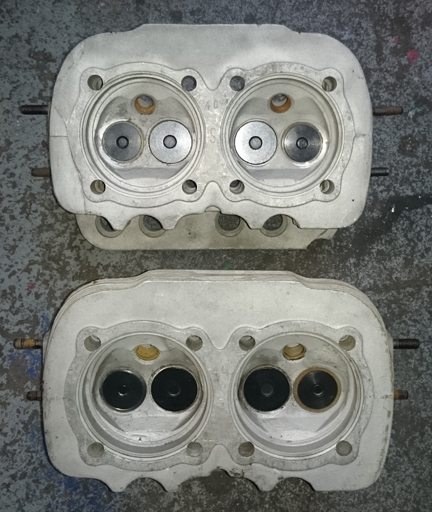
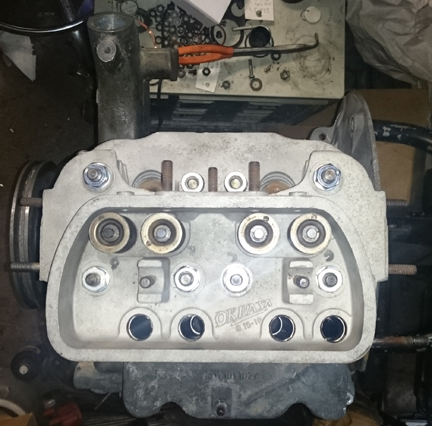
These heads were from the late 1950s and are of the "high rise" type.
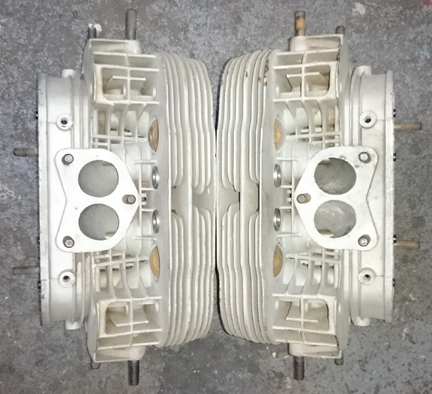
They were completely overhauled. Here are the new parts installed:
The volume of the combustion chambers was measured and found to be 40ml.

OK, now that we have all our basic data, mount the rings back onto the pistons and lets get those pistons and cylinders installed, and mount up those heads!
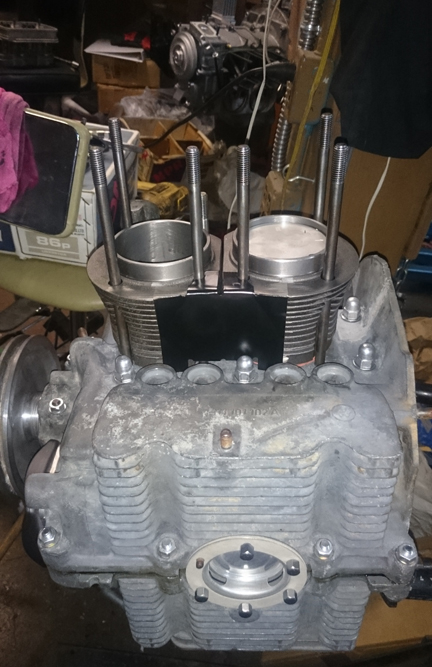
At first, paper sump gaskets were fitted, later upgraded to the Wolfsburg West silicone type.
As mentioned above, below you can see the new silicone type sump gaskets being installed.
Powder-coated sheetmetal all the way...

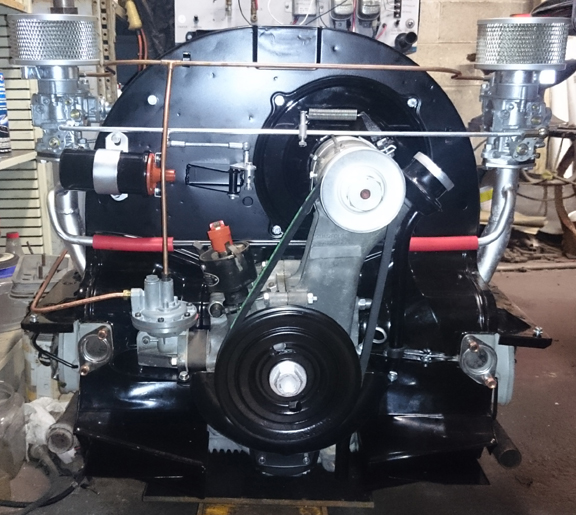
The "small diameter 12v" generator shown here was tested once we got it on the dynamometer and unfortunately didn't work. So, it was removed and standard 6v parts fitted. (See the video up top to get a visual of the other one.)
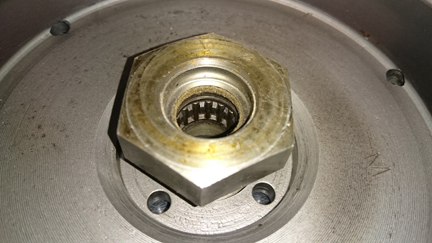
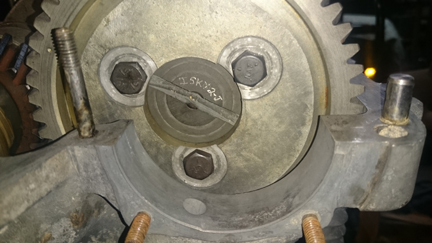
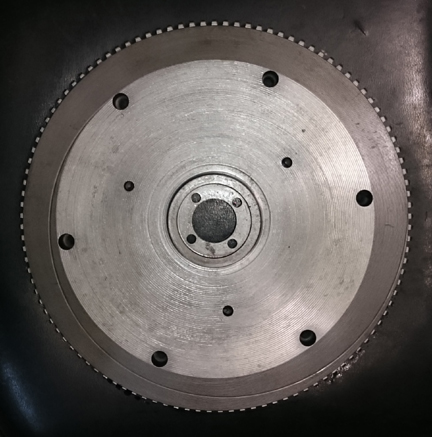
New gland nut, of course! Flywheel re-faced too, and a new, old-school pressure plate was fitted with a new clutch disk as well.
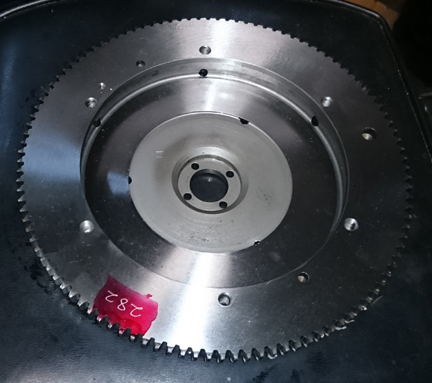
Of course the flywheel and pressure plate were balanced as a pair - the red-marking being the hallmark provided by the person who did the balancing work.
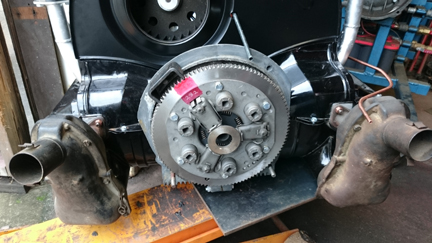
Here it is mounted to the dynamometer awaiting the run-in process.
NOTE: If this engine is sold as a long-block... One should NOT install the distributor drive gear without also installing a distributor because if anyone rotates the engine backwards, it will push the drive gear up where it can damage the bronze drive gear! Therefore, the distributor drive is NOT mounted until the last reasonable moment!
When you're ready for work on your machine, just let us know.
Because some people are keeping logs of VIN and engine numbers and then purport to tell people what someone else has, out of respect and concern for a buyer's privacy, exact VIN and engine number data are not published here.