Copyright © 2007 - 2024, Coachworks For contact data Click Here.
Copyright © 2007 - 2024
Copyright © 2007 - 2024,
Coachworks For contact data
Click Here.
![]()
For this vehicle's main web page, click here.
The original brakes on this car were drums, as can be seen in great detail on this page for a different early Ghia. However, if you're going to have a high-horsepower engine, you should have awesome brakes, too - not to mention that in today's world, every garden-variety Honda can out-brake a '50s era Ghia, no matter how fast you're going! So, better brakes, but which ones? I've owned all the early Porsches through to the 911 series, and the 356 A and B series drums are truly awesome! And, they're a bolt-in solution!
In spite of that, I decided that because I had already been running A and B series brakes on my Karmann Ghias for decades, I wanted Porsche 356 C model disk brakes. The A and B series brakes in dry and cool conditions are a match for the C brake, but the C has the following advantages:
Also, I didn't want any aftermarket conversion kit - just not my thing. And also note that the Porsche 356 C was the world's first mass-produced automobile with 4 wheel disk brakes, though, the individually made Mercedes Gullwing 300SL predates it...
Once the chassis was ready, the front and rear axles were mounted, then the brakes rebuilt.
 Preparations
A lot of preparations were made long in advance of assembly. Some photographs apparently weren't made or can't be found but here's some of what went on to make magic happen.
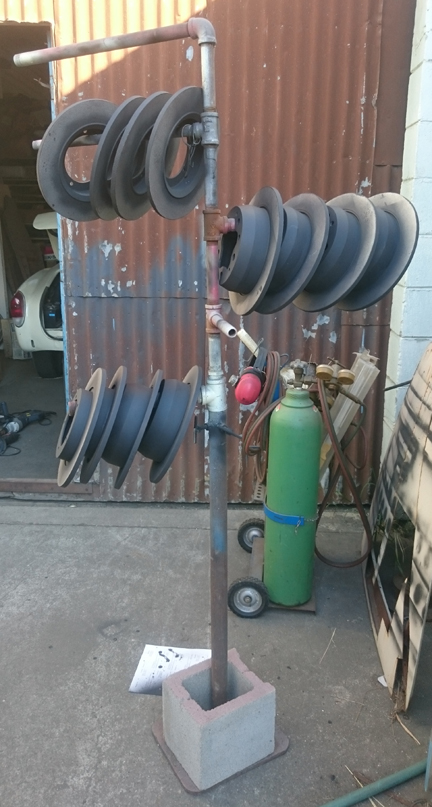
AT RIGHT: Why do one set at a time when you have three to do? ...These C disks were all professionally media blasted, then painted with a high-temperature paint to prevent further rusting. There's no real point to painting the friction surfaces, but there's also no need to protect them from over-spray because they'll clean up on first service use. And, some of that overspray may help prevent flash-over surface rust until they are installed. ...Like the painting stand?
Of course there are the obvious things like finding all the right parts, cleaning them, inspecting them, making or modifying pieces, etc. You'll find a lot of the non-obvious detail of that sort elsewhere on this page.
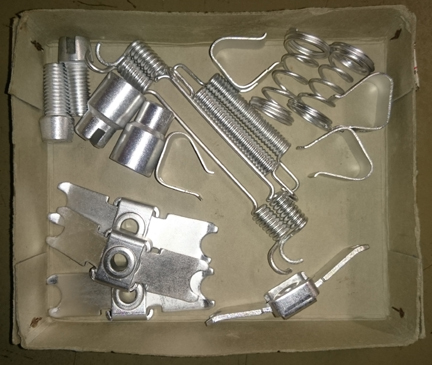
ABOVE LEFT: The small steel parts of the rear brake assembly were plated with the "CAD II" process. Look great, and are protected for long life.
In the rear, the enginering challenges were two:
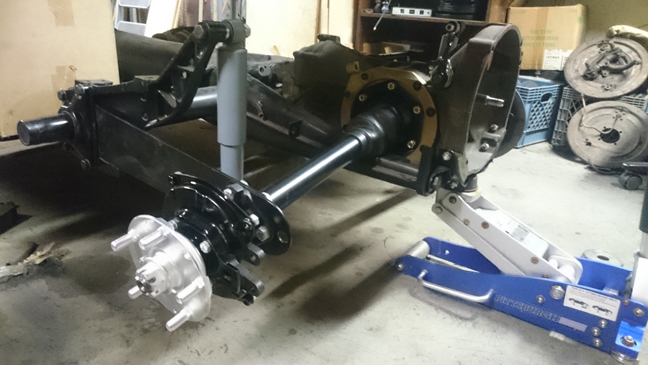
Installation of the rear brakes began with solving these problems as described below but when the time came to actually assemble the parts, it began with installing the already prepared axle tubes to the transaxle, which can be seen here:
![]()
![]()
ABOVE LEFT AND RIGHT: The axle-tube end-castings support the disk brake caliper and also provide a place for the shock to mount. These are slightly modified 356C end-castings, as the shock mount has been rotated a few degrees to clear the spring plate. This is only required when the axles are flipped right-for left as described in the text below. ...Also note in these images the sold axle boots, as original on swing-axle VWs (but rarely done today). The side-covers are aftermarket to handle the more-than-double stock horsepower anticipated. The differential is a quad-spider type for double the tooth contact area. The nose cone permits this later, fully-synchronous tunnel-type transaxle to be fitted into the vehicle instead of the earlier split-case, non-synchro first gear type transaxle.
 In
order to solve the first problem, the shock location, I decided to flip the
axles right for left. I used two donor spring plates, cutting off the last few
inches of the rear of one pair to make brackets that permit the axle end-casting
to be fully mounted to the spring plate despte one bolt otherwise hanging in
the air in the back. The idea is that there will be four M12 fasteners attaching
each spring plate to the bracket, the forward pair being the former rear pair
with M12 bolts going through the end-casting, the spring plate and the bracket,
and the rearward pair being two studs welded into the bracket that only to through
the spring plate. The bracket now solidly mounted via four bolts then supports
the end-castings third bolt way out in back.
In
order to solve the first problem, the shock location, I decided to flip the
axles right for left. I used two donor spring plates, cutting off the last few
inches of the rear of one pair to make brackets that permit the axle end-casting
to be fully mounted to the spring plate despte one bolt otherwise hanging in
the air in the back. The idea is that there will be four M12 fasteners attaching
each spring plate to the bracket, the forward pair being the former rear pair
with M12 bolts going through the end-casting, the spring plate and the bracket,
and the rearward pair being two studs welded into the bracket that only to through
the spring plate. The bracket now solidly mounted via four bolts then supports
the end-castings third bolt way out in back.
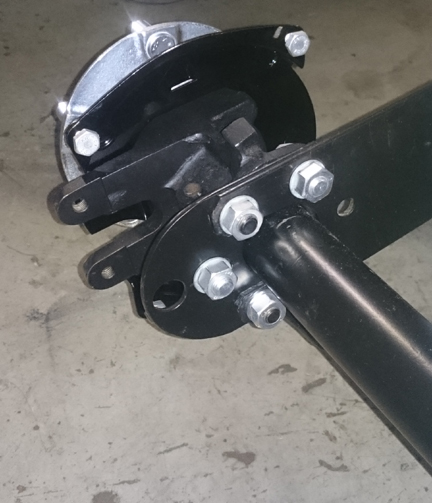
AT RIGHT: Here the bracket and modifications can be clearly seen. The nuts with black dots in their center are mounted to studs welded to the bracket, while the others are M12 bolts.
I used non-adjusting spring plates, so the bracket will mount to it in a fixed, not adjustable position, but added two "adjustment slot" sized holes for the two new bolt-holes, and I used adjustable spring plate donors for the two brackets. This way, if adjustment is needed, the spring plate and bracket can stay put and the axle can be moved by losening the three M12 fasteners, just as is normally done.
While at it, I also provided some extra length to the brackets provide for the hand-brake cable support bushing that's also mounted in a removeable bracket on the 356 C. I truncated the rear of the bracket with a nice arc.
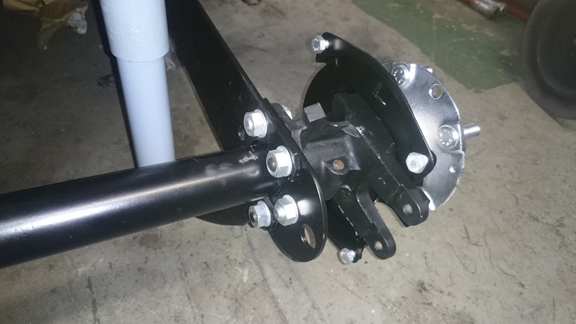
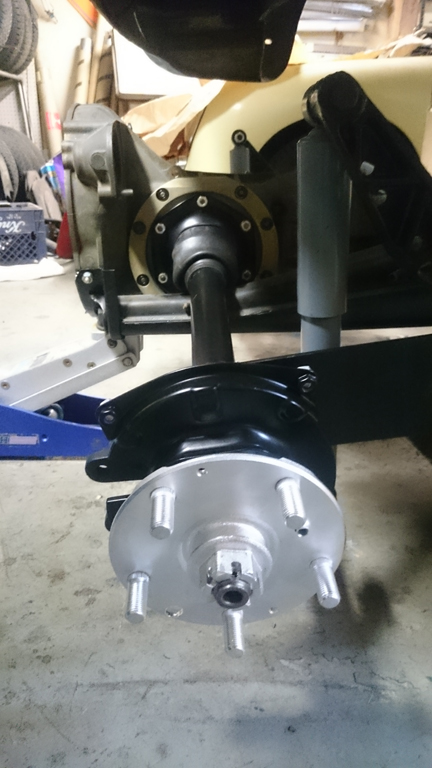
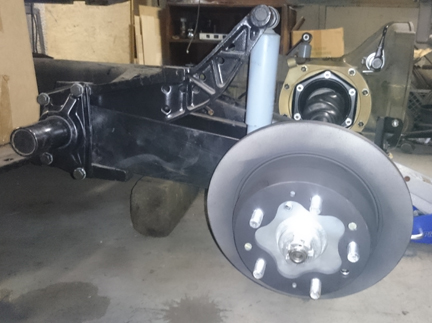
BELOW LEFT: The right side, with a slightly different perspective. Here you can see minor injuries to the paint coatings - a result of assembly. The spring arms are pretty stiff and can be hard to align - these will be touched up before it's all done. Also note here the four short bolts mounted at the four corners of the black plate at right. These are for the dust plates which I have chosen not to install until the hand brake cables are installed - the cables have gone missing in action and maybe I'll have to make a new pair!
 The
sharp eyed - and knowledgeable viewer can see in this image at left both a front
and rear Porsche 356 B series brake backing plates.
The
sharp eyed - and knowledgeable viewer can see in this image at left both a front
and rear Porsche 356 B series brake backing plates.
The transaxle is a '71 series with guide-tube for the clutch for improved clutch action. It has "freeway flyer" gears with a tall ring and pinion (3.88:1), a quad-differential and super-strong side-covers for durability. The axle boots are original '50s era solid type. The shocks are original Boge brand - I tried several sets, and found not all have the required length, but these do, and these have the right internal valving. The rear torson bar busings were replaced, of course!
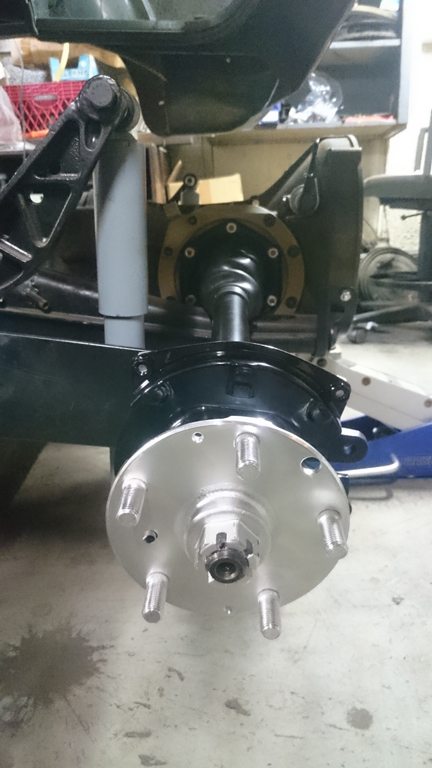
Following the basic installation, the hand-brake assemblies are installed.
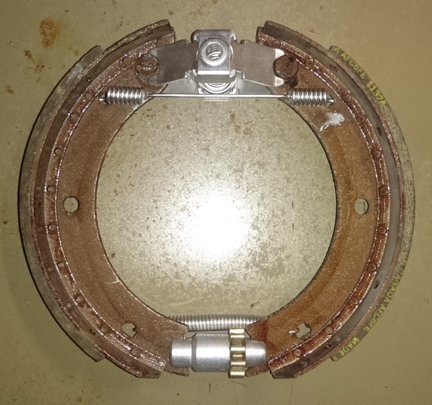
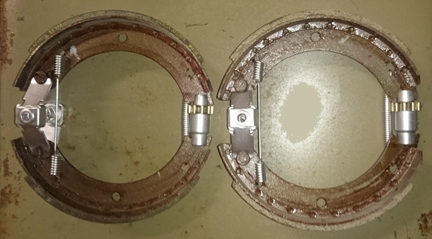
LEFT AND ABOVE RIGHT: The hand-brake shoes, ready for installation.
BELOW LEFT: The hand-brake assembly complete except for the hand brake cable... The cables have gone AWOL! They're lost in the shop at present - may have to make a new pair.

Finally, we have this... Note that the hand brake cables are not yet mounted, and neither are the dust plates.
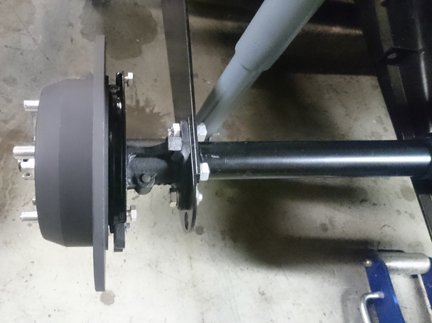


AT RIGHT: Here we're almost done in the back. I just have to find those pesky hand brake cables - or make a new pair - and install them. I'll install the dust plates at the same time... ...The sharp-eyed observer may notice the nose of a champaign yellow Porsche 356 SC (with C disk brakes) in the immediately adjacent bay!
Want to see more of this vehicle? Click here.